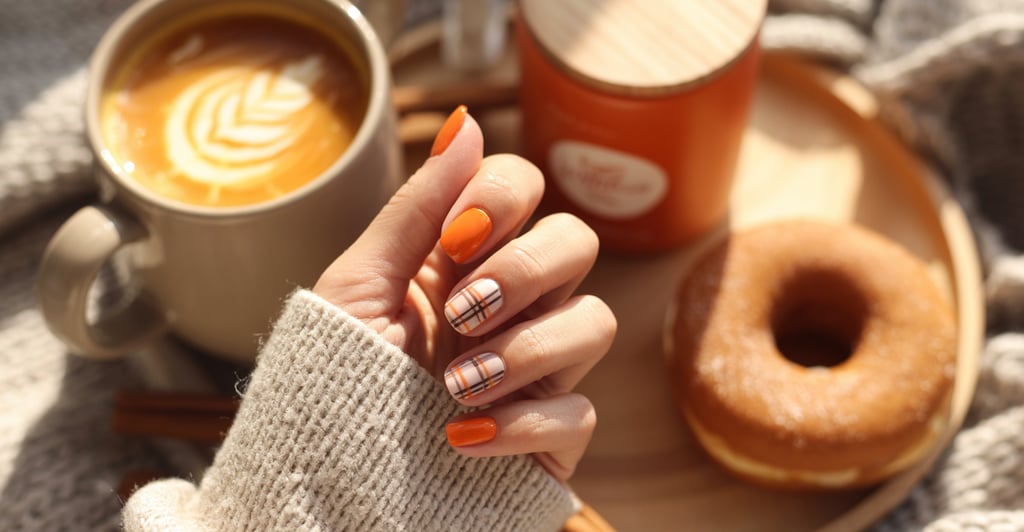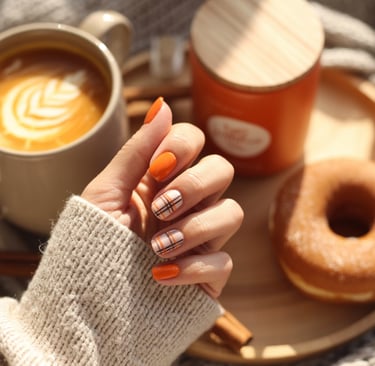

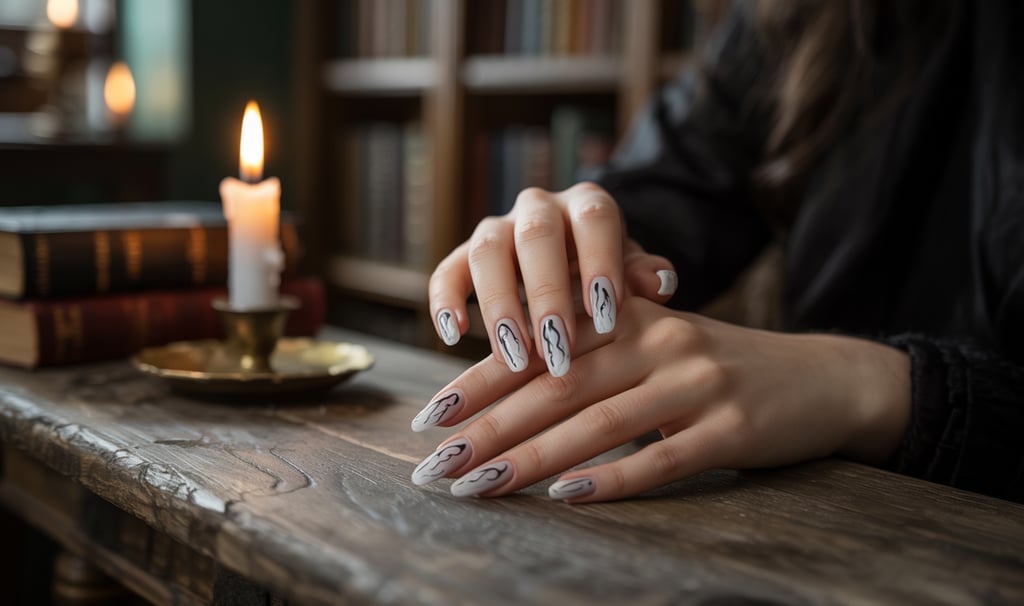
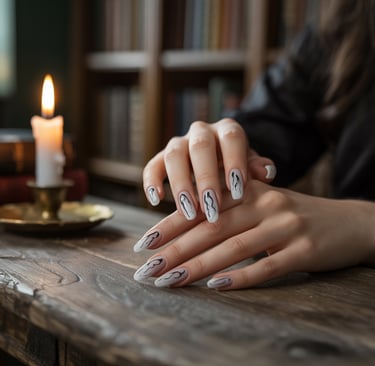
DIY Halloween Nails You Can Do from Your Couch (Yes, With Snacks!)
Who says Halloween glam needs a trip to the salon? These spooky-cute DIY nail ideas are perfect for a cozy night in with your favorite snacks, scary movies, and a little self-care magic. Low effort, high vibe—just the way we like it.
HOLIDAYS AND SPECIAL OCCASIONS
FONNI
6/21/202511 min read
The content on this site was created with the help of AI. LOVEOWE LLC participates in the Amazon Services LLC Associates Program by linking to Amazon.com and other affiliate programs. This means I may earn a small commission—at no extra cost to you—when you make a purchase through links on this site. All opinions are my own. Learn more click here. Thank you for your support!
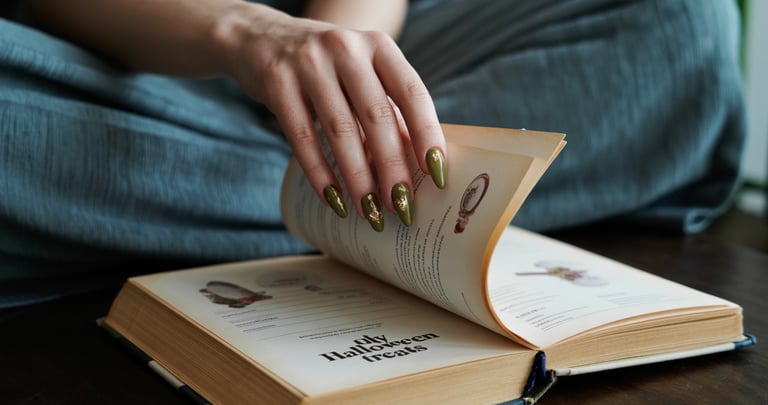
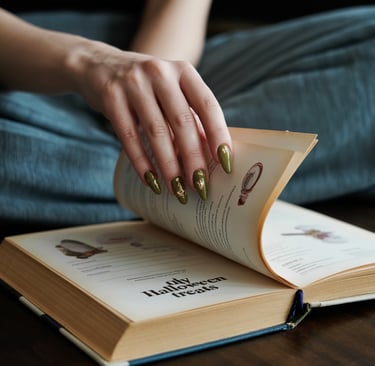
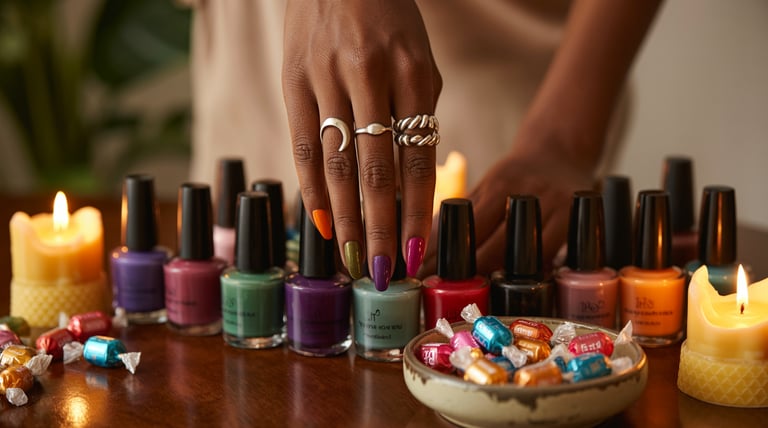
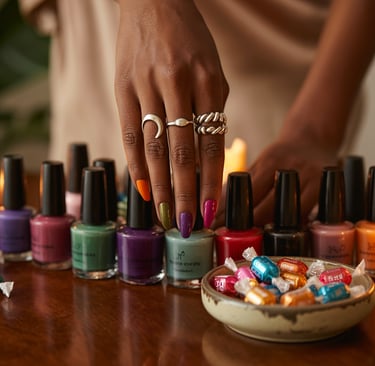
As Halloween draws near, I relish in decorating my home and indulging in a manicure. This year, I'm eager to guide you through crafting a hauntingly beautiful Halloween nail art at home.
I recently sought to infuse Halloween magic into my daily life. So, I attempted a Halloween manicure from home. With basic tools and a dash of creativity, I achieved a spooky-chic look. It made me feel like I was ready for a Halloween bash.
Creating your own halloween nail art at home is surprisingly simple. It's a fantastic way to unleash your creativity while snacking on your favorites. In this article, we'll dive into some easy yet stylish ideas for your next at-home manicure.
Getting into the Halloween Spirit with Nail Art
The magic of Halloween is already everywhere, and as a Style Raven, your costume isn’t complete without a befitting manicure. Halloween nail art is a fantastic way to get into the spirit of the season. Doing it from the comfort of your home can be a fun and creative experience.
Why Halloween Nail Art Is the Perfect Seasonal Expression
Halloween nail art allows you to express your creativity and get into the Halloween spirit. It's a fun way to celebrate the season and can be a great conversation starter. With DIY nail art, you have the freedom to choose designs that reflect your personality, from spooky to cute.
Benefits of DIY Nail Art vs. Salon Visits
Opting for DIY nail art at home has several benefits over visiting a salon. For one, it's more convenient and cost-effective. You can also be more creative with your designs, trying out different looks without the commitment of a salon visit. Here's a comparison:
AspectDIY Nail ArtSalon VisitCostGenerally cheaper, as you can use supplies you already have at homeCan be expensive, with intricate designs costing moreCreativityUnlimited creativity; you can try multiple designsLimited by the nail artist's expertise and your budgetTimeFlexible; you can work on your nails at any timeRequires scheduling an appointment and waiting
By choosing DIY nail art, you can enjoy the process of creating your Halloween look while saving time and money.
Setting Up Your Couch Nail Station
Turning your couch into a nail art station is simpler than you might think. I'm here to walk you through it. With just a few basic supplies and some smart organization, you'll be crafting your own DIY Halloween nails in no time.
Essential Supplies for Halloween Nail Art
To kick things off, gather a few essential items. Here's a rundown of what you'll need for some spooky and fun Halloween nail art:
White Nail Polish
Matte top coat (I used Essie Matte About You)
Fine black Sharpie marker
Nail art brushes
Nail polish remover
Having these supplies ready will make it simple to follow along with "easy halloween nails tutorial" guides. You'll be able to create your own unique designs.
Creating a Mess-Free Workspace on Your Couch
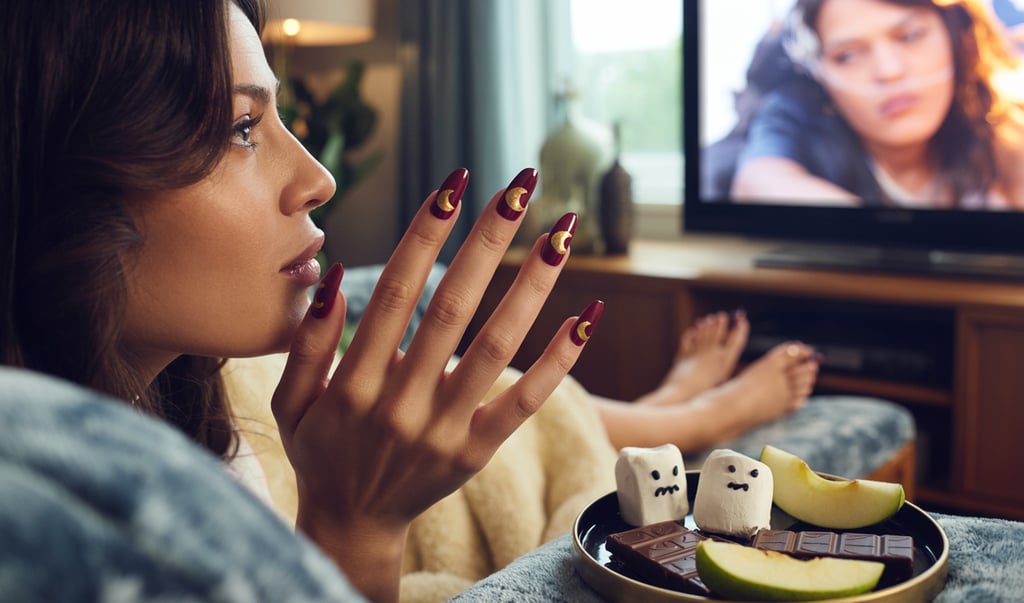
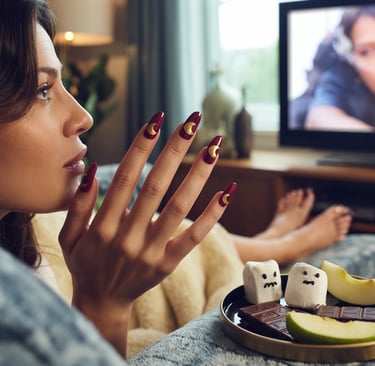
One of the best aspects of "halloween nail art with snacks" is enjoying your favorite treats while you work. To keep your couch clean and mess-free, use a nail polish holder or a small tray for your supplies. Also, lay down a protective cloth or old towel to catch any spills.
By setting up your couch nail station thoughtfully, you'll be able to relax and enjoy the process of creating your own "diy halloween nails you can do from your couch".
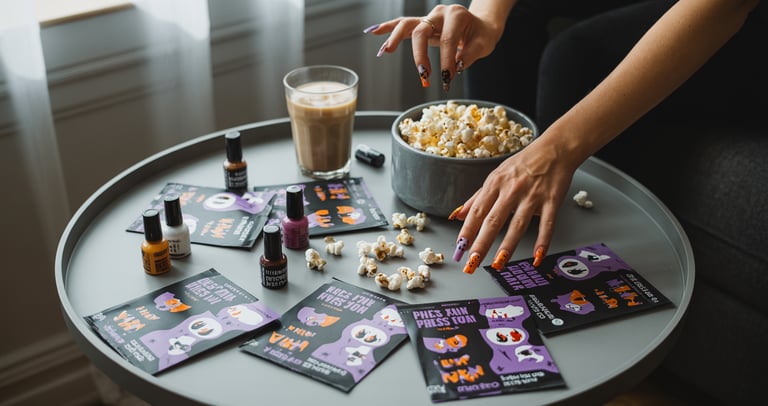
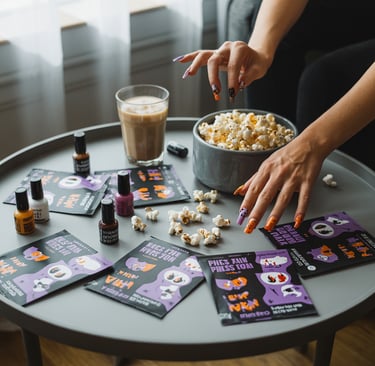
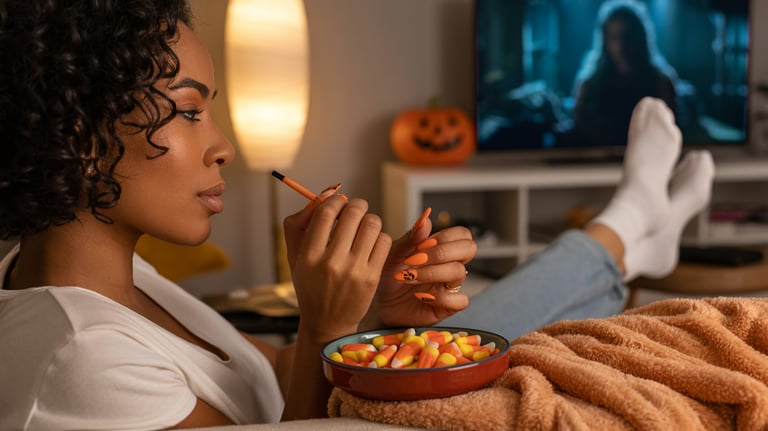
Snack Pairings for Your Halloween Nail Art Session
Exploring Halloween nail art brings us to the importance of snacks. The right treats can enhance our creativity. Yet, it's vital to pick snacks that won't harm our manicure.
No-Smudge Snack Options
Choosing snacks without smudges is key for a clean nail art session. Here are some ideas:
Dried fruit like cranberries or apricots
Nuts, such as almonds or walnuts
Popcorn (just be sure to avoid getting kernels on your nails)
Energy balls made from oats and honey
These snacks are mess-free and offer a quick energy boost. They help keep you focused on your nail art.
Halloween-Themed Treats That Won't Ruin Your Manicure
Enhance your snacking with Halloween-themed treats. These are easy to eat and won't damage your manicure:
Candy corn
Chocolate eyeballs or other Halloween-themed chocolates
Pumpkin-shaped cookies or other Halloween-themed baked goods
These treats add to the festive vibe. They make your Halloween nail art session both fun and memorable.
Basic Nail Prep Techniques for Perfect Halloween Designs
Before you start your Halloween nail art, it's essential to prep your nails. A well-prepared nail is the base for any great design. Whether it's a subtle accent or a full Halloween spectacle, proper prep is key. Let's explore the necessary steps to get your nails ready for Halloween.
Proper Nail Cleaning and Shaping
Begin by cleaning your nails with a gentle cleanser to remove oils and residue. This step is crucial for a strong bond between your nail and polish. Then, shape your nails to your desired form. For Halloween, a squoval or almond shape can add elegance or spookiness, depending on your design.
Base Coat Application Tips
Apply a base coat to protect your nails and ensure even polish adhesion. Use a thin layer to prevent polish from pooling at the cuticles. For bright or pastel Halloween designs, a two-coat white manicure will enhance your colors.
Creating the Perfect Canvas for Halloween Art
With your nails clean, shaped, and coated, you're ready for Halloween nail art. The goal is to work on a smooth, even surface. If you're new to nail art, practice on a nail wheel or a single nail before tackling complex designs.
DIY Halloween Nails You Can Do from Your Couch (Yes, With Snacks!) - Beginner-Friendly Designs
As Halloween draws near, it's time to transform your nails into spooky masterpieces from your couch. These beginner-friendly designs promise salon-quality results without leaving your home. So, get ready to unleash your creativity with these easy DIY Halloween nail designs.
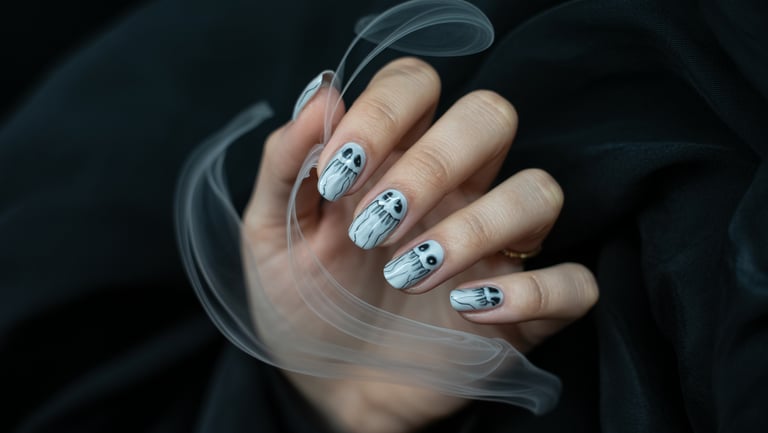
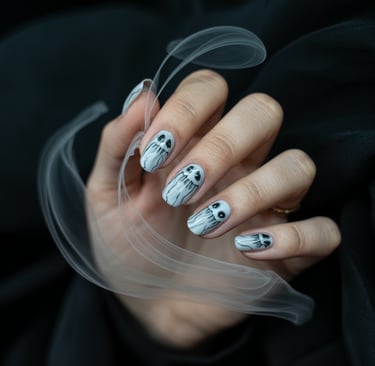
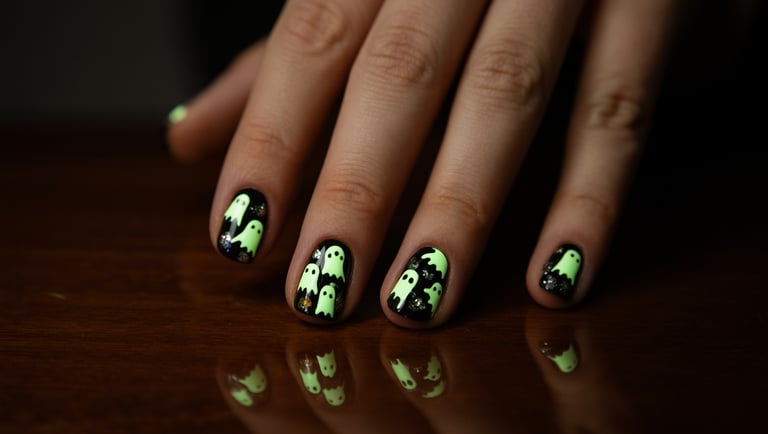
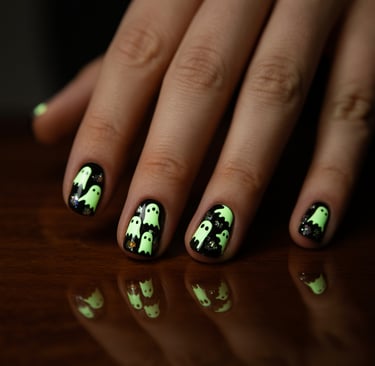
Spooky Ghost Nails
Transform your nails into ghostly apparitions with a simple white coat and some creative touches. Here's how to do it:
Step1: Base Preparation
Begin by applying a clear base coat to protect your nails.
Step2: Creating the Ghost Shape
Paint a ghostly shape on your nail using white nail polish. You can use a nail guide or freehand it for a more rustic look.
Step3: Adding Details and Finishing
Draw ghostly eyes and an open mouth on one nail at a time with a Sharpie marker. Seal your design with a top coat.
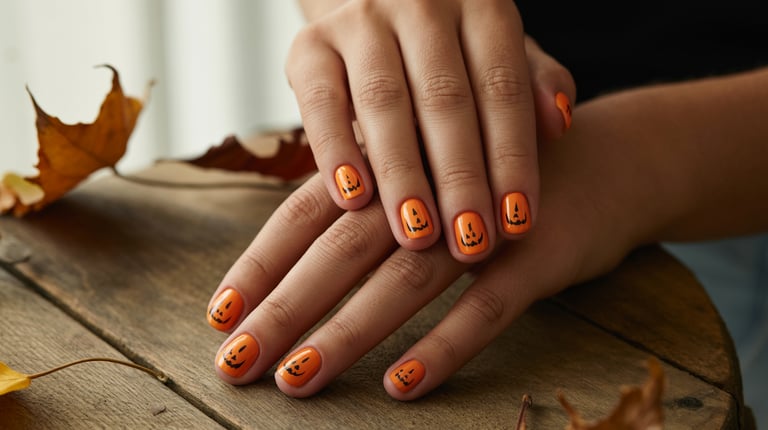
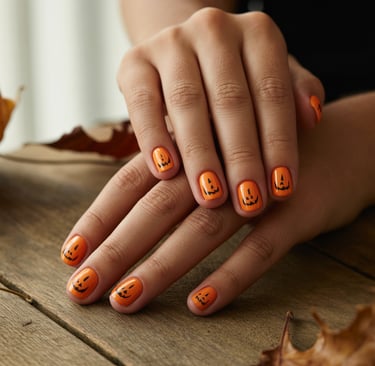
Simple Pumpkin Accent Nails
Add a splash of orange to your nails with this simple pumpkin accent design.
Step1: Orange Base Application
Apply an orange base coat to one or all of your nails, depending on your design preference.
Step2: Creating Pumpkin Features
Paint on pumpkin features like a stem or vines using black nail polish.
Step3: Adding Stems and Vines
Use green nail polish to create stems and vines, enhancing your pumpkin design.
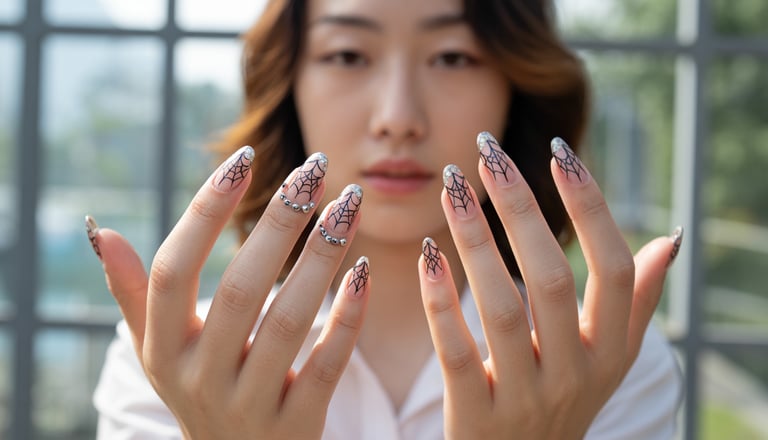
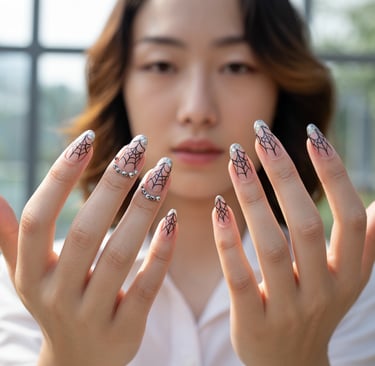
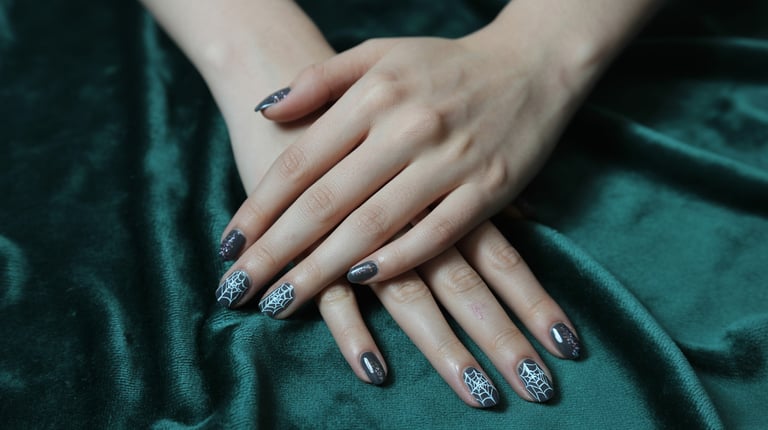
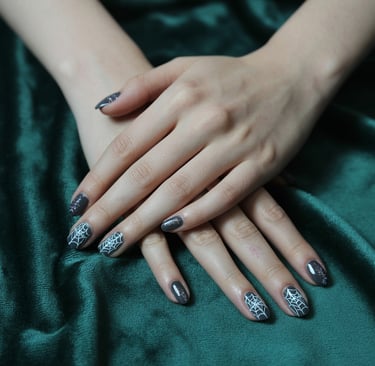
Spiderweb Design for Beginners
Bring a spooky spiderweb effect to your nails with this beginner-friendly design.
Step1: Dark Base Application
Begin with a dark-colored base coat for a dramatic background.
Step2: Creating Web Lines
Paint web lines starting from the center of your nail using white or light-colored nail polish.
Step3: Adding Spiders and Details
Add a spider or other creepy crawlies to your design with black nail polish.
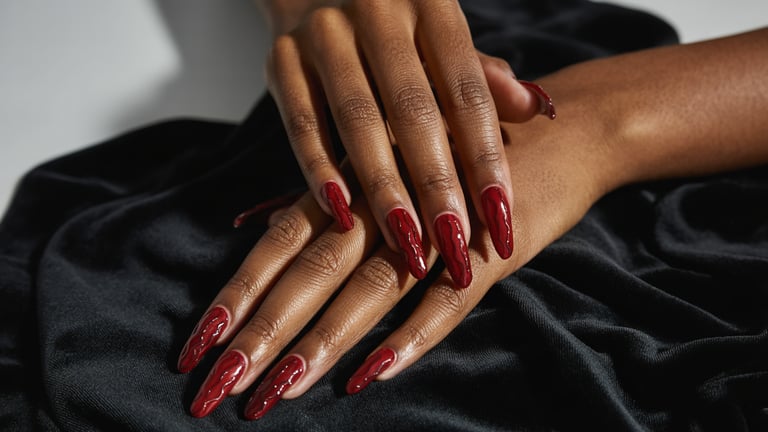
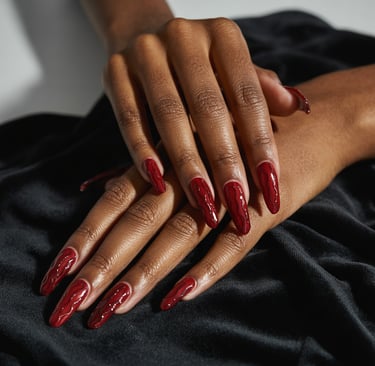
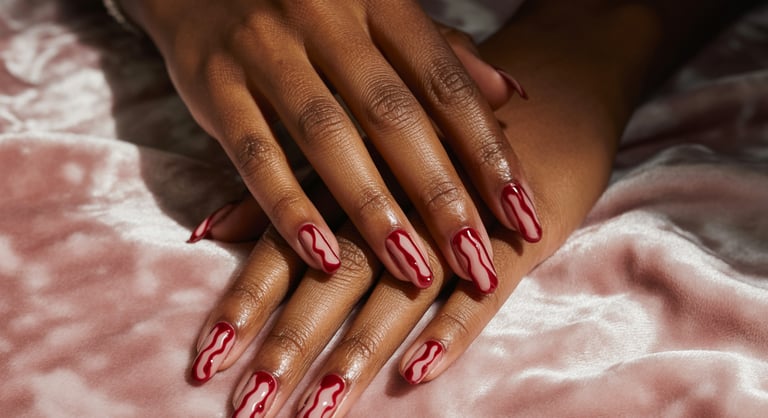
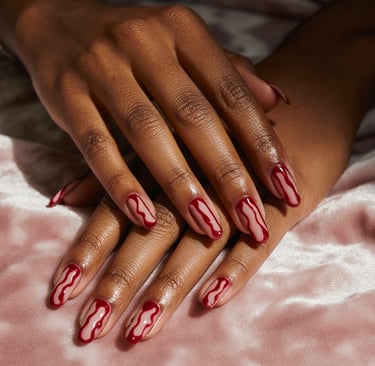
Blood Drip Nails
Recreate a spooky blood drip effect on your nails with this simple design.
Step1: Base Color Application
Apply a red or pink base coat for a bloody effect.
Step2: Creating the Drip Effect
Use a darker red or black nail polish to create a drip effect on your nail.
Step3: Sealing and Finishing
Seal your design with a top coat to add shine.
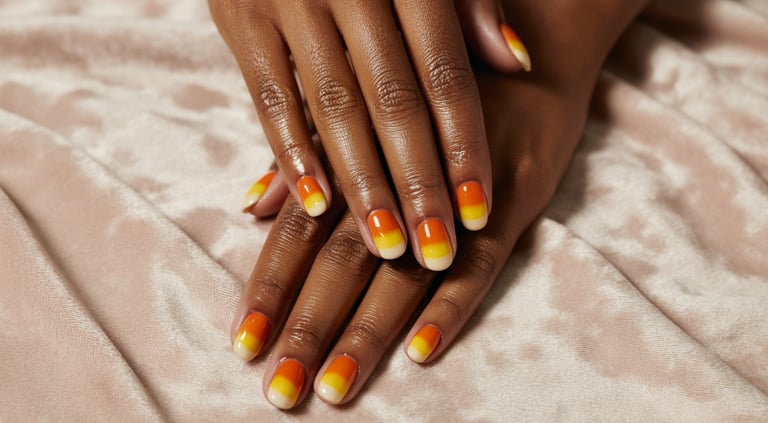
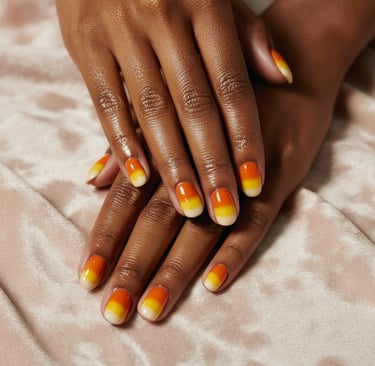
Candy Corn Inspired Gradient
Bring a colorful candy corn-inspired gradient to your nails with this easy design.
Step1: Color Blocking
Divide your nail into sections and apply different colors for a gradient effect.
Step2: Blending the Colors
Blend the colors using a makeup sponge or nail brush for a smooth transition.
Step3: Adding Definition and Shine
Finish with a top coat to add shine and definition to your design.
Intermediate Halloween Nail Art Techniques
Exploring intermediate Halloween nail art reveals techniques that elevate your spooky designs. At this level, you're not just creating nail art; you're crafting a statement piece that reflects your creativity and skill.
Stamping for Perfect Halloween Patterns
Stamping is a fantastic technique for achieving intricate designs with ease. To get started, you'll need a stamping kit, which usually includes a stamper, scraper, and stamping plates.
Step1: Choosing the Right Stamping Plates
Select stamping plates that feature Halloween-themed designs, such as bats, spiders, or jack-o'-lanterns. Ensure the plate is clean and dry before use.
Step2: Mastering the Stamping Technique
Apply a small amount of nail polish to the design on the stamping plate. Use the scraper to remove excess polish, and then pick up the design with your stamper. Gently stamp the design onto your nail.
Step3: Layering Stamps for Complex Designs
To create more complex designs, layer different stamps on top of each other. Allow each layer to dry before adding the next to prevent smudging.
Freehand Brush Techniques for Spooky Details
Freehand brush techniques allow for a high level of creativity and customization. With the right brushes, you can paint on intricate details that make your Halloween nail art stand out.
Step1: Selecting the Right Brushes
Choose brushes with fine tips for detailed work. You can use nail art brushes or even a dotting tool for creating small dots and patterns.
Step2: Basic Stroke Techniques
Practice basic strokes like lines, curves, and dots. These are the building blocks of more complex designs.
Step3: Creating Detailed Halloween Elements
Use your brushes to paint on Halloween-themed elements, such as cobwebs, ghosts, or monsters. Take your time, and don't be afraid to experiment.
Working with Nail Gems and 3D Elements
Nail gems and 3D elements add a tactile dimension to your nail art. They can be used to create dramatic, eye-catching designs.
Step1: Proper Placement Techniques
Use a dotting tool or a small amount of nail glue to place gems or 3D elements onto your nail. Position them carefully to achieve the desired effect.
Step2: Securing 3D Elements
Apply a top coat to secure your gems or 3D elements in place. Make sure the top coat is fully dry to prevent them from coming loose.
TechniqueDescriptionSkill LevelStampingUsing stamping plates to create intricate designsIntermediateFreehand BrushworkPainting on designs with brushesIntermediateNail Gems and 3D ElementsAdding dimensional elements to nail artIntermediate
By mastering these intermediate Halloween nail art techniques, you'll be able to create stunning, professional-looking designs that are sure to impress. Whether you're stamping on intricate patterns, painting on spooky details, or adding dimensional elements, your nail art will stand out this Halloween season.
Advanced Halloween Nail Designs for the Ambitious
Unleash your inner artist and create show-stopping Halloween nail art with these advanced designs. As we dive into the more complex and intricate nail art techniques, you'll be able to transform your nails into a true masterpiece.
Haunted House Full Scene Nail Art
Create a haunted house scene on your nails with these step-by-step instructions. This design is perfect for those who want to push their nail art skills to the next level.
Step 1: Creating the Background
Start by painting a dark background on your nail. Use a black or dark blue polish to create a spooky night sky. You can add some subtle gradient effects to give it depth.
Step 2: Building the House Structure
Using a nail art brush, paint the outline of a haunted house on your nail. You can use a gray or white polish to create the structure. Add some details like windows and a door.
Step 3: Adding Spooky Details and Characters
Bring your haunted house to life by adding spooky details and characters. You can paint ghosts, bats, or spiders around the house. Use a small brush to add these details.
Glow-in-the-Dark Halloween Nails
Add an extra layer of excitement to your Halloween nail art with glow-in-the-dark designs. These nails are sure to be a hit at any Halloween party.
Step 1: Working with Glow Polishes
Start by applying a glow-in-the-dark base coat. Make sure to choose a high-quality glow polish that will give you the desired effect.
Step 2: Creating Hidden Designs
Use a black light polish to paint designs on top of the glow base coat. These designs will be invisible under normal light but will glow in the dark.
Step 3: Layering for Maximum Glow Effect
Apply multiple layers of glow polish, allowing each layer to dry before adding the next. This will enhance the glow effect and make your nails stand out.
Mixed Media Halloween Manicures
Take your Halloween nail art to the next level by incorporating mixed media elements. This technique adds a new dimension to your nail art.
Step 1: Combining Different Materials
Experiment with different materials like glitter, rhinestones, or even fabric to add texture to your nail art. Make sure to seal these elements with a top coat to prevent them from falling off.
Step 2: Creating Dimension and Texture
Use a combination of nail art techniques and materials to create dimension and texture. For example, you can use 3D gel to create raised designs or structures. "3D adds a sense of realness to anything, even something scary. Use an overlay of structured gel to bring your spooky friends to life."
Quick-Dry Tips for Impatient Nail Artists
Conclusion
Creating DIY Halloween nails is a fun and creative way to get into the spooky spirit. With the right supplies, techniques, and a little practice, you can achieve salon-quality nail art from the comfort of your own home. This approach allows you to express your creativity freely.
By following the steps outlined in this guide, you'll be able to create a variety of Halloween-inspired designs, from simple to complex. Whether you're a beginner or an experienced nail artist, the world of DIY Halloween nails is full of possibilities. It's a space where creativity knows no bounds.
So, gather your favorite snacks, get cozy on your couch, and let your creativity shine with DIY Halloween nail art. With these tips and tricks, you'll be sure to impress your friends and family with your spooky nail designs. It's a great way to celebrate the holiday season.
The wait for nail polish to dry is a necessary evil, but there are ways to make it less painful. Whether you're a seasoned nail artist or a beginner, we've all been there. We eagerly wait for our nails to dry so we can get on with our day or show off our Halloween designs.
Products That Speed Up Drying Time
Several products on the market are designed to speed up the drying process of your nail polish. Here are a few options:
Quick-dry top coats
Nail drying sprays
Drying drops
ProductDescriptionPrice RangeQuick-Dry Top CoatSeals in polish and speeds up drying$5-$10Nail Drying SpraySprays on to accelerate evaporation$8-$12Drying DropsDrops onto wet polish to dry fast$6-$8
Activities You Can Do While Waiting for Nails to Dry
While waiting for your nails to dry, you can engage in various activities to pass the time. Here are a few ideas:
Check your phone or respond to messages
Plan your Halloween costume
Watch a short video or a Halloween-themed movie
By utilizing these quick-dry tips and products, you can minimize the wait. This way, you can enjoy your Halloween nail art without the frustration of slow-drying polish.
Troubleshooting Common Halloween Nail Art Mistakes
Don't let a few simple mistakes ruin your Halloween nail art - with a little know-how, you can fix them in no time. Whether you're a seasoned nail artist or a beginner, errors can happen. The key is knowing how to troubleshoot them effectively.
Fixing Smudges and Smears
Smudges and smears are among the most common issues when doing nail art at home. To fix them, use a small brush dipped in nail polish remover to gently correct the area. If you wait until your two coats are dry, you can actually just draw on your eyes and mouth easily. For more intricate designs, a cotton swab with remover can help clean up small smudges.
Salvaging Botched Designs
Sometimes, a design just doesn't turn out as planned. Instead of starting over, try to salvage it. For instance, if a spider web design gets messy, you can turn it into a creepy splatter effect by adding a few more "splashes" around it. Creativity can often turn a mistake into a unique look.
When to Start Over vs. When to Incorporate Mistakes
Deciding whether to start over or incorporate a mistake depends on the severity of the error and your design's overall look. If the mistake is minor, it can often be worked into the design. But if it's significant and can't be easily fixed, it might be better to start fresh. Here's a quick guide to help you decide:
ActionMinor MistakeMajor MistakeFixUse a small brush with removerStart overIncorporateTurn into a design elementNot recommended
Making Your Halloween Nail Art Last Through Spooky Season